Apache Tomcat 8官方版
下载地址
下载地址


本地下载文件大小:9.2M
Apache Tomcat 8.0是普通服务器,本身只支持html即普通网页,通过插件支持php,所以该工具是目前十分热门的一款兼容32位和64位系统由Apache开发的免费且开源的轻量级WEB应用TomCat服务器。力成和议得休兵,痛骂犹烦诸老生。拘执行人招覆灭,幸逃诛死罚殊轻。Apache Tomcat 包含了一个配置管理工具,也可以通过编辑 XML 格式的配置文件来进行配置。Apache,nginx,tomcat并称为网页服务三剑客,可见其应用度之广泛。有需要使用这款服务器工具的用户快来下面KKX分享的地址来获取吧!
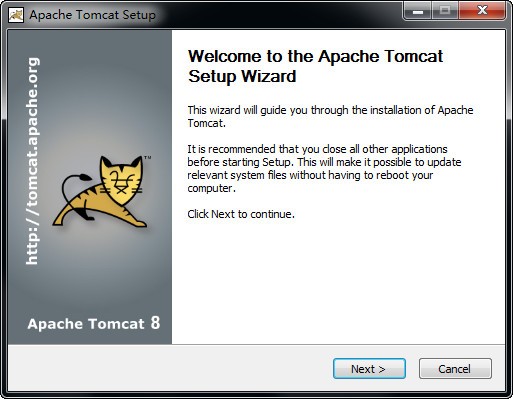
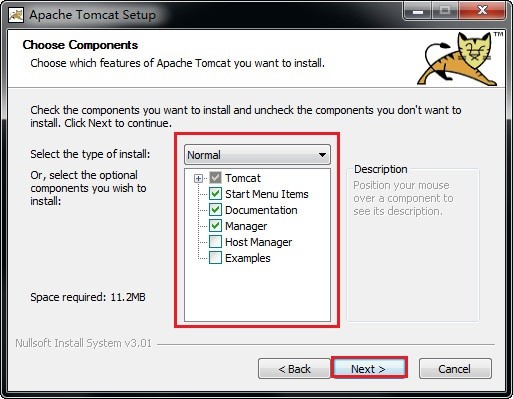
一:下载完成后开始安装,第一次安装的用户建议直接点击“next”不选择插件
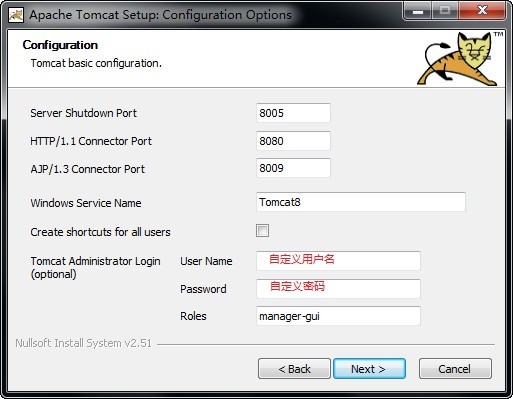
可以自行设置账户名以及密码
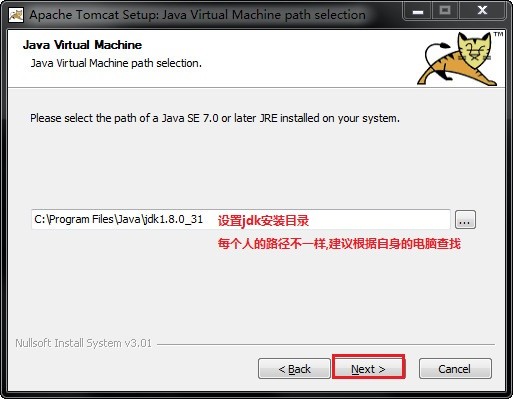
Java virtualMachine
Java Virtual Machine path selection.
Please select the path of a Java SE 7.0 or later RE installed on your system.
设置jdk安装目录,每个人的路径都不一样,建议根据自己的电脑查找,这一步非常的重要
二:安装完成后右击我的电脑—属性—高级系统设置—环境变量,
在系统变量中添加以下变量
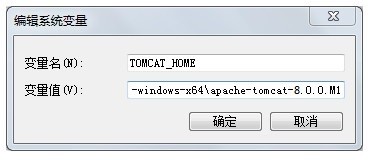
(1)TOMCAT_HOME,该变量指向解压文件的路径,该目录下有lib、bin等文件夹。添加方法如下:
点击环境变量下的“新建”,在“变量名”中填写“TOMCAT_HOME”,在“变量值”中填写解压文件的路径,
D:\Tomcat\apache-tomcat-8.0-windows-x64\apache-tomcat-8.0
(后面没有分号)然后点击“确定”,如图
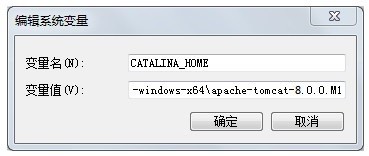
(2)CATALINA_HOME,该变量的值与TOMCAT_HOME相同,设置方法同(1),如图
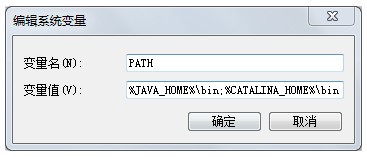
(3)在“系统变量”中找到Path变量,双击打开Path变量,在“变量值”的最后面添加
%CATALINA_HOME%\bin
(后面没有分号),如图
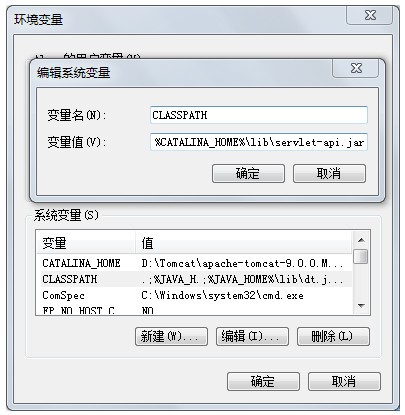
(4)在“系统变量”中找到CLASSPath变量,双击打开CLASSPath变量,在“变量值”的最后面添加
%CATALINA_HOME%\lib\servlet-api.jar
(后面没有分号),如图
三:单击“开始”—“运行”,键入"cmd",在控制台输入service install Tomcat8,
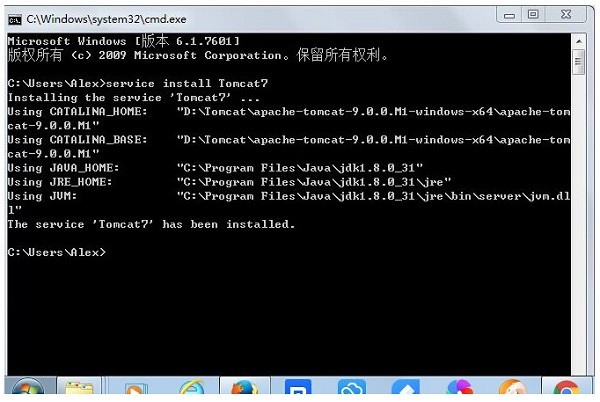
出现以上黑窗体便表示安装成功!
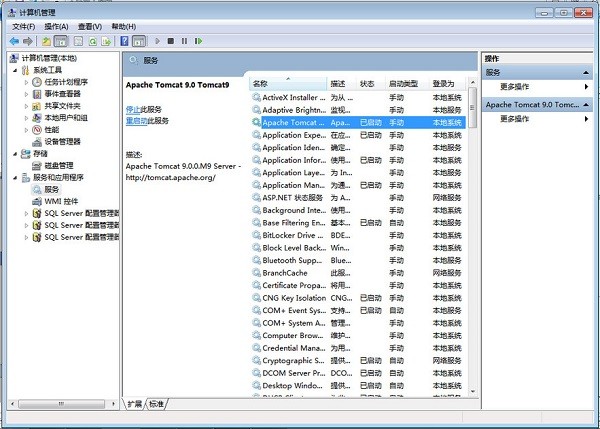
进入控制面板—系统和安全—管理工具—服务,找到Apache Tomcat Tomcat9服务项,右击该项,点“启动”,启动该服务,见下图所示:
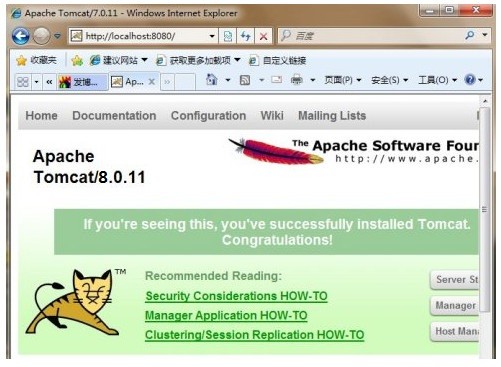
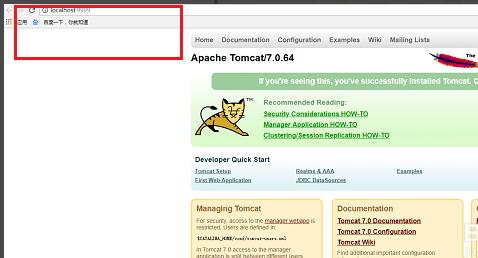
打开浏览器,地址栏输入http://localhost:8080或 http://127.0.0.1:8080
如果出现tomcat示例主页,则表示服务器安装成功,见下图所示:
修改默认端口号的操作方法
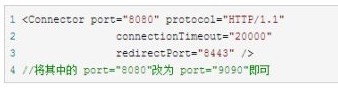
1、tomcat的安装路径,进去conf目录,打开server.xml文件。
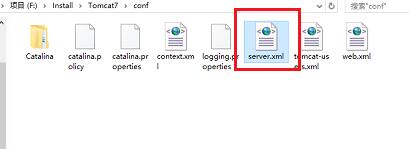
2、打开server.xml文件之后,可以看到默认是8080端口。
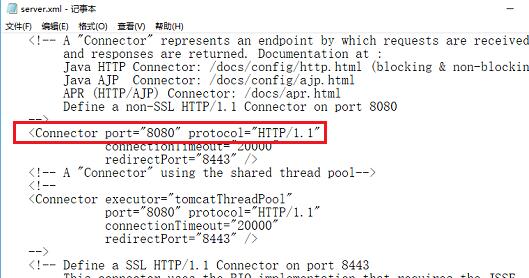
3、您可以自行修改。
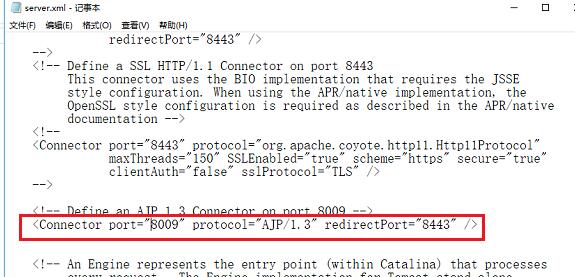
4、如果想同时使用多个tomcat的话,还需要改动8009端口,这里将端口改为18009
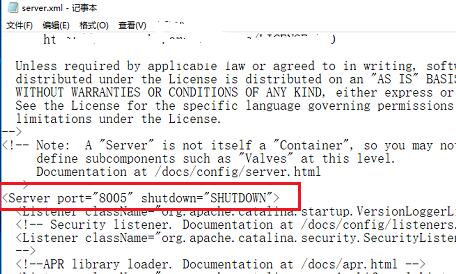
5、改动8005端口,这里将端口改为18005

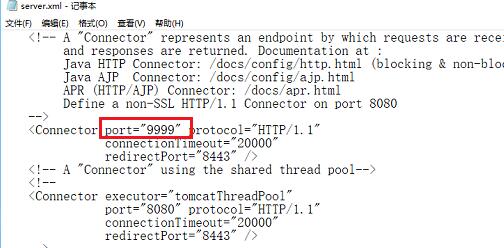
6、重启tomcat之后,在浏览器输入“http://localhost:9999/”,打开了tomcat,代表设置成功,也可以再打开另外一个tomcat,查看两个tomcat是否都能启用。
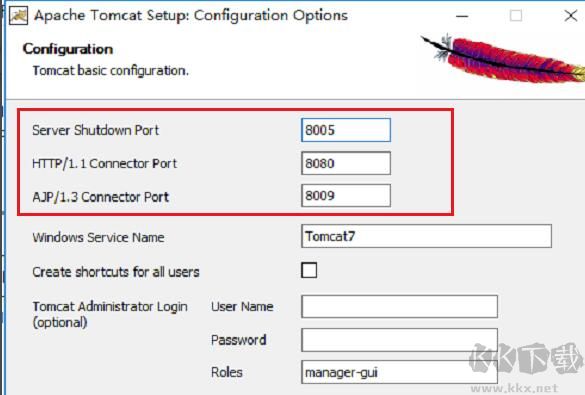
7、如果是安装版的tomcat的话,在安装的时候,会提示设置端口
如果8080端口被占用了可以修改tomcat的访问端口,方法如下:找到D:\Tomcat\apache-tomcat-8.0-windows-x64\apache-tomcat-8.0\conf目录下的server.xml文件,打开该文件,找到以下内容就可以了啊别担心。
以上便是KKX下载小编为大家分享介绍的Apache Tomcat 8官方版!
 Apache jmeter v5.0官方版42.79MBApache Tomcat 8官方版 9.2M
 ApacheJMeter v3.7官方版47.7M
 Apache v2.2.26 官方版4.75MB
 TOMCAT v10.0.21官方版9.2M
 tomcat6 v6.0官方版15.12MB
返回顶部
Copyright © 2009-2023 KKX.Net. All Rights Reserved .
KK下载站是专业的免费软件下载站点,提供绿色软件、免费软件,手机软件,系统软件,单机游戏等热门资源安全下载!
本站资源均收集整理于互联网,其著作权归原作者所有,如果有侵犯您权利的资源,请来信告知
 远程桌面软件NoMachine v5.3.10免费版
 Microsoft Windows Installer v4.5简体中文版
 雷电模拟器电脑版 v9.0.38官方最新版
 智播管家 v3.4 官方最新版
 Nero8 v8.3.9 中文破解版
 湖南省电子税务局 v3.1.258 官方最新版
 搜狗推广管家 v8.1官方版
 AquaSnap Pro(电脑窗口管理器) V1.23.3绿色版